Friday, January 27, 2012

Peanut Butter Fudge Brownie Trifle

Creamy Peanut Butter Pie
Serves 10 to 12
8 ounces chocolate cookies
4 tablespoons butter, melted
4 ounces finely chopped chocolate or semi-sweet chocolate chips
1/4 cup chopped peanuts
1 cup heavy cream
8 ounces cream cheese
1 cup creamy-style peanut butter
1 cup confectioner's sugar
1 – 14 ounce can sweetened condensed milk
1 teaspoon vanilla extract
1 teaspoon freshly squeezed lemon juice
Add the cookies to the bowl of a food processor and pulse into fine crumbs.  Combine melted butter and cookie crumbs in a small bowl, and stir with a fork to mix well.  Press mixture into the bottom and 1-inch up the sides of a 9-inch springform pan.
Melt the chocolate in a double boiler or in the microwave.  Pour over bottom of cookie crust and spread to the edges using an off-set spatula.  Sprinkle chopped peanuts over the melted chocolate. Place pan in the refrigerator while you prepare the filling.
Pour the heavy cream into a bowl and beat using a stand mixer or hand mixer until stiff peaks form.  Transfer to a small bowl and store in refrigerator until ready to use.  Place the cream cheese and peanut butter in a deep bowl.  Beat on medium speed until light and fluffy.  Reduce speed to low and gradually beat in the confectioner's sugar.  Add the sweetened condensed milk, vanilla extract and lemon juice. Increase speed to medium and beat until all the ingredients are combined and filling is smooth.
Stir in 1/3 of the whipped cream into the filling mixture (helps lighten the batter, making it easier to fold in the remaining whipped cream).  Fold in the remaining whipped cream.  Pour the filling into the prepared springform pan.  Drizzle the melted chocolate on top, if using, and refrigerate for three hours or overnight before serving.


    Next comes the Trfle

    1 batch of your favorite brownies, boxed or from scratch, cooled and cut into cubes
    1 large box (5-ounce) of instant chocolate pudding, prepared and chilled (this will most likely call for 3 cups of milk, nothing else)
    1 bag of peanut butter cups, chopped (I used Dove chocolate peanut butter Promises)
    2 cups heavy cream
    3-4 tablespoons granulated sugar, depending on your desired level of sweetness
    1 cup of creamy peanut butter
    1 cup of powdered sugar
    2 tablespoons milk
    8 ounces of whipped cream cheese, at room temperature
    In the bowl of an electric mixer (or using a hand mixer), beat heavy cream and sugar on medium-high speed until stiff peaks form. Transfer the whipped cream to an separate bowl and stick in the fridge until ready to use. I did not even clean the bowl of my electric mixer and just began mixing the peanut butter mixture.
    Add the peanut butter and cream cheese to the bowl and beat at medium speed, scraping down the sides a few times until mixture is creamy. Add in powdered sugar and mix until combined, then mix in 2 tablespoons of milk. Remove the whipped cream from the fridge and add 1 cup of it to the peanut butter, folding it in until the mixture turns lighter in color and is mostly combined.
    Grab your trifle dish and begin to layer your ingredients however you’d like. I did a layer of brownies, then peanut butter, then a handful of chopped peanut butter cups, chocolate pudding, whipped cream, and so on. I repeated it until I got to the top, then piped the remaining whipped cream on top and sprinkled the candy on. You really can’t go wrong with layering – just use a long spoon to serve!
    Thursday, January 26, 2012

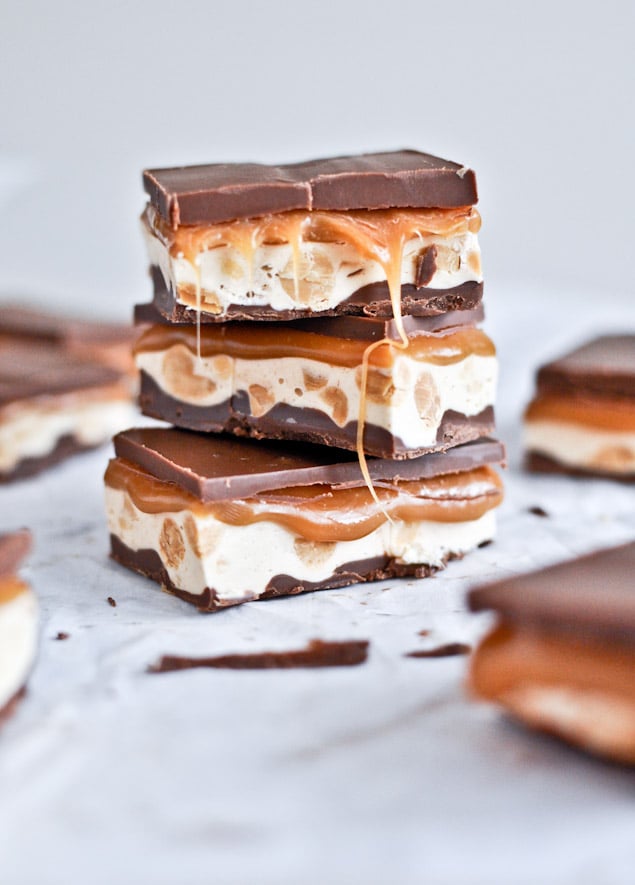
    Home-Made Snicker Bars - Yes, That's What I am Talking About

    Oh, Oh, oh!!!  Yes, the big Oh! these look so yummy!!!

    bottom chocolate layer
    1 1/4 cups milk chocolate chips
    1/4 cup peanut butter
    Thoroughly grease you baking pan. Melt ingredients together in a saucepan or microwave, then pour into the baking dish and spread until even. Let cool and harden completely.
    nougat layer
    1/4 cup unsalted butter
    1 cup granulated sugar
    1/4 cup evaporated milk
    1 1/2 cups marshmallow fluff
    1/4 cup peanut butter
    1 1/2 cup salted peanuts chopped, roughly chopped
    1 tsp vanilla extract
    Melt butter in a saucepan over medium heat. Add in sugar and milk, stirring until dissolved and bring to a boil. Let cook for 5 minutes, stirring occasionally. Add in fluff, peanut butter and vanilla, stirring until smooth. Turn off heat and fold in peanuts, then pour over bottom chocolate layer. Let cool completely.
    caramel layer
    1 14-ounce bag of caramels
    1/4 cup whipping cream
    Combine ingredients in a saucepan over low heat. Let melt, stirring occasionally, until smooth – this took about 10 minutes for me. Pour over nougat layer and let cool completely.
    Top chocolate layer
    1 1/4 cups milk chocolate chips
    1/4 cup peanut butter
    Melt ingredients together in a saucepan or microwave, then pour over caramel and spread until even. Let cool and harden completely.
    Refrigerate for at least one hour before serving, then cut as desired. These can stay at room temperature, but they do get gooey. I like them refrigerated best!
    Note: for best results, buy one of the half-sheet aluminum cake pans at the grocery store. That way, you can pop the entire square out and cut from there!

    Wednesday, January 25, 2012

    Cranberry Anti-Aging Mask

    Cranberry sauce is a Thanksgiving staple and there are bound to be leftover berries to create this awesome anti-aging facemask by Erika Katz, beauty expert and author of Bonding Over Beauty, a great book for mothers and daughters.
    You’ll need:
    1 cup fresh cranberries
    1 cup seedless red grapes
    2 tsp grapefruit juice
    1 envelope unflavored gelatin
    Directions:
    Mix ingredients until the mixture becomes paste-like. Cover and refrigerate for 45 minutes and let it thicken. Remove from the fridge and let sit about 10 minutes. Spread the mixture on clean, dry skin, avoiding the eye area. Relax for 15 minutes, then rinse off with warm water.
    The benefits of the mask come from the fruit acid, which acts as a gentle exfoliant; the grapefruit juice acts as a toner; and the cranberries are a rich antioxidant harboring a one-two punch of vitamins A and C to help with collagen production.

    Friday, January 20, 2012

    Peanut Butter Cookies - Soft Recipe

    Oh My!  These look like Lou Hall's Peanut Butter Cookies...from back in the day when school lunches were awesome.
    Soft Peanut Butter Cookies
    (adapted from Epicurious)
    • 1 1/4 cups unbleached all-purpose flour
    • 1/2 teaspoon baking soda
    • 1/2 teaspoon baking powder
    • 1/2 teaspoon fine salt
    • 8 tablespoons (1 stick) unsalted butter, at room temperature
    • 3/4 cup smooth peanut butter (natural/unsweetened)
    • 1 cup firmly packed dark brown sugar
    • 1  large egg, at room temperature
    • 1 teaspoon vanilla extract
    • 1 cup peanut butter chips

    1. Preheat the oven to 350 and grease some cookie trays.
    2. Whisk together the flour, baking powder, baking soda, and salt.
    3. In a mixer's bowl cream together the butter, sugar, peanut butter, and egg until well combined then add the vanilla extract
    4. With a wooden spoon or the mixer on a low setting mix the flour mixture in with the peanut butter mixture in three additions until just combined.
    5. Roll out 1.5 tbsp balls of cookie dough and gently flatten with a fork.
    6. Bake for ten minutes, rotating the cookie sheets after five minutes. Let cool on the tray until firm enough to move to a cooling rack.

    P1240160

    How is awesome is this? Parmesan or Cinnamon Bites

    Take a Texas size Rhodes roll that has been thawed.
    Roll it out in a four inch rope.
    Cut in four sections.
    I got tired of this method.
    so I simplified even more.
    Take your roll, and cut horizontally and vertically.
    You have four pieces.
    You will need:
    as well as:
    Once your bites are all cut,
    place on a large greased baking sheet.
    Let rise until double in size.
    Like this . . .
    Bring some water to boil in a large pot.
    Prepare a Baking sheet with a clean towel and Paper towels on top.
    Like this:
    Heat your oven to 375 Degrees.
    Plop about 10 bites into that boiling water.
    Toss gently so that all sides are shocked with the water.
    You will boil for about 45 seconds.
    Remove from water with a slotted spoon.
    Let drain on paper towels.
    Don’t worry if a few of them shrivel up funny.
    They will recover nicely in the oven!
    Remove them carefully from the paper towels.
    Place on greased baking sheet.
    Bake at 375 degrees for about 15 minutes.
    Let them bake until they are a nice golden color.
    like this . . .
    Roll in Parmesan and sprinkle with garlic and Kosher Salt.
     Oh yum!
    or do this:
    Use that Cinnamon and Sugar mixture.
    and this:
    You’ll be too busy eating and dipping to watch the big game!
    PRETZEL BITES
    Texas size Rhodes Frozen roll dough
    *as many as you like – each roll makes four bites
    coarse salt, parmesan, garlic, cinnamon & sugar
    Vanilla glaze (optional)
    Take a thawed roll.  Cut it in four equal sections.  Place dough bites on greased sheets. I placed five across and five down on large baking sheets.  Cover with plastic wrap that has been sprayed with non-stick cooking spray, and let dough rise until double in size. (about 35-45 minutes) Bring a large pot of water to a gentle boil.  When dough has risen, plop about 10 pieces into the boiling water, tossing gently for about 45 seconds. Remove with slotted spoon, and place bites on paper towels to drain slightly.  Move bites to greased baking sheets, and bake at 375 degrees for about 15 minutes or until done and golden brown. 
    Brush bites with melted butter, sprinkle with Kosher or Sea Salt, garlic and toss in Parmesan cheese.  You can also make Cinnamon and Sugar bites. Make a mixture of Cinnamon and sugar:  About 1 cup sugar and 1 1/2 tsp. of cinnamon, and mix together well. After you butter the pretzel bites, toss in cinnamon and sugar mixture.
    You can serve the Parmesan Pretzel bites with a cheddar dip, and the Cinnamon and Sugar Pretzel bites with Vanilla glaze.  So yummy . . . so simple!
    VANILLA GLAZE
    1 cup powdered sugar
    2 tablespoons milk
    1 tablespoon melted butter
    1 tsp. vanilla extract.
    Combine sugar, milk, butter and vanilla and mix well. 
    CHEDDAR DIP
    1 Tablespoon butter
    1 Tablespoon all purpose flour
    1 cup milk
    1 1/2  to 2 cups of grated Cheddar Cheese.
    Melt the butter in a med. size saucepan over medium heat.  Add the flour and stir until blended, and
    butter has turned lightly golden brown.  Slowly whisk in the milk and cook until thickened slightly.  Remove from heat and stir in the Cheddar Cheese until smooth and all of the cheese has melted.  Season with salt and pepper.  Shake a few red pepper flakes into sauce for added zing!
     
    I found the above on Pinterest.com and it is from Get off your butt and bake.

    Coconut Bar Lotion

    These bars contain coconut oil & shea butter which will hydrate and heal the skin absolutely 100% naturally!The idea behind these babies is that they melt gently when they come in contact with your own body heat.  Did you know that coconut oil is also said to help prevent sun burns & sun damage? Apparently that’s what the Jamaicans use.


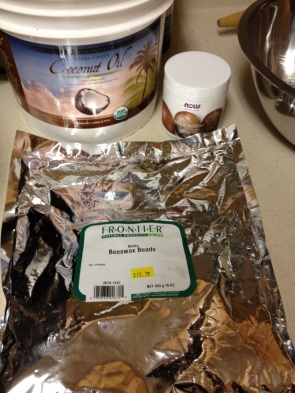
    Coconut oil, shae butter & beeswax pellets
    Here’s what you’ll need: 
    4 o.z beeswax pellets
    4 o.z shea butter
    5 o.z coconut oil melted (coconut oil melts at 76 degrees)
    Glass measuring cup
    Mixing bowl
    Double broiler
    Mini cup cake pan or  mold of your choice
    What to do:
    Ingredients
    1. In a large heat safe mixing bowl, add the beeswax, coconut oil & shae butter.
    Double broiler
    2. Make a double broiler. To do so, fill a large pot with water and place it on the stove over medium heat, as if you were going to cook pasta. The steam from the water will gently melt your ingredients.
    3. Set your mixing bowl with all three ingredients on top of the pot filled with water.
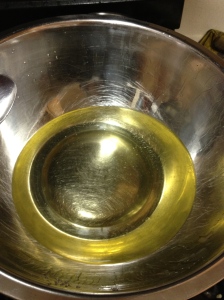
    Melted ingredients
    4. Let the ingredients melt, stir occasionally.
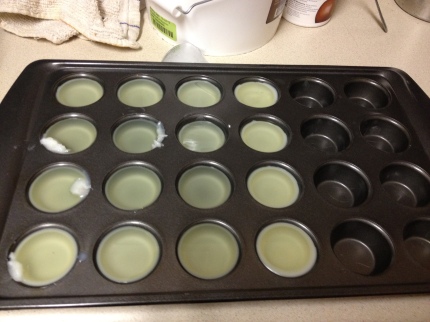
    5. Pour into mini muffin tin or metal mold of your choice. If you wanted more of a bar shape, you could use a mini loaf pan. I was also reading that people used Tetra pak cartons, like the cartons broth comes in. Simply clean the carton out well & cut in half and pour the mixture according to how thick you would like the bar to be.
    Lotion bar mixture in mini muffin pan.
    After these hardened, I put them in the freezer for a bit. Then I flipped them onto foil (I ran out of parchment paper) and they popped right out of the muffin tin.
    Lotion bars
    Unbelievably easy. So dang smart!
    The best thing about making your own anything, is always that you know exactly what is in it! No parabens, phthalates or toxic chemicals here!  Make sure to store away from heat. An old Altoids tin or something similar would be best. I’m going to store most of these in the freezer until I find something to tote them in. By the way, I spent less than $25 on the beeswax & shea butter. The beeswax was $15 for 16 o.z, so I’m sure you can make these for cheaper. Making these is definitely a must! 
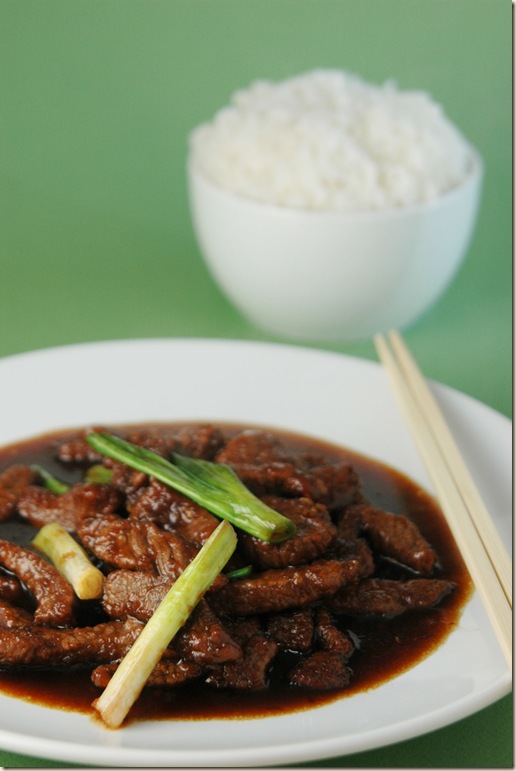
    Mongolian Beef Recipe

    From Pink Bites as found on Pinterest.com...yes please!!

    Mongolian Beef Recipe:
    makes 2 servings
    You will need:

    1 lb of flank steak, thinly sliced crosswise
    1/4 cup of cornstarch
    3 teaspoons of canola oil
    1/2 teaspoon of grated ginger (about 1/2 inch piece)
    1 tablespoon of chopped garlic (about 2 -3 large cloves)
    1/2 cup of water
    1/2 cup of soy sauce (I use low sodium)
    1/2 cup brown sugar
    1/2 teaspoon of red pepper flakes
    3 large green onions, sliced crosswise into thirds


    Prepare the meat:
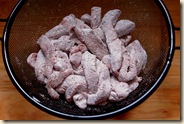
    First, make sure the steak slices are dry (pat them dry) and mix them with the corn starch. Using your hands or a spoon, move them around to make sure all pieces are coated. Place beef slices in a strainer and shake off excess corn starch (see picture bellow).
    Make the sauce:
    Heat half of the oil in a large wok at medium-high and add the garlic and ginger. Immediately add the soy sauce, water, brown sugar and pepper flakes. Cook the sauce for about 2 minutes and transfer to a bowl. Don't worry if the sauce doesn't look thick enough at this point. The corn starch in the beef will thicken it up later. 
    Cook the meat and assemble dish:
    Turn the heat up and add the remaining oil to the wok. Add the beef and cook, stirring until it is all browned (this is a quick thing). Pour the sauce back into the wok and let it cook along with the meat. Now you can choose to cook it down and reduce the sauce or leave it thinner. Add the green onions on the last minute so the green parts will stay green and the white parts crunchy.
    Serve it hot with rice.


    mongolian prepUse a strainer to help shake off excess corn starch from beef. They should be lightly coated, not over coated with corn starch.


    monolian 2

    Snickerdoodle Cupcakes -

    Pinned Image
    Cakes:
    1 ½ cup all purpose flour
    1 teaspoon baking powder
    ¼ teaspoon salt
    ½ teaspoon cinnamon
    ½ cup melted butter, cooled
    1 ¼ cup sugar
    2 eggs
    1 teaspoon vanilla
    ¼ teaspoon almond extract
    ¾ cup whole milk*
    ¼ cup cinnamon sugar

    Cinnamon Vanilla Buttercream:
    1 stick butter softened
    3 cups powdered sugar
    ½ teaspoon vanilla
    1 teaspoon cinnamon
    3 Tablespoons milk


    Directions:
    1.     Preheat oven to 350 degrees.
    2.    Sift together flour, baking powder, salt and cinnamon.
    3.    In a separate bowl, beat sugar and cooled butter until light and fluffy.  Then add eggs, vanilla, almond extract and milk. Mix until well blended. 
    4.    Combine dry and wet ingredients and mix until smooth. 
    5.    Spoon into cupcake liners and bake for 18-25 minutes, or until a toothpick comes out clean. 
    6.   When the cupcakes come out of the oven, brush the tops with butter and then roll them in cinnamon sugar. 
    7.    Buttercream:  Beat butter until light and fluffy.  Add 2-3 cups powdered sugar (taste along the way) and beat for 4-5 minutes.  Add vanilla and cinnamon.  Add milk to loosen.
    8.   Top cupcakes with buttercream when cooled.  

    *I didn’t have whole milk, so I just used ¾ cup 1% and melted a little extra butter.  

    Felt Name Book - for the Babies - Pinterest.com

    Materials Needed:
    - Sheet of Wonder-Under (can be found next to the interfacing at your local fabric store)
    - Felt pattern pieces (already cut and ready to go)
    - Iron/ ironing board
    - Press cloth (I either use a thin washcloth or a thin dish towel) 
    - scissors (I use paper scissors to cut the Wonder-Under, NOT my cloth-only scissors)
    - pencil

    The How-To:
    1. Lay out your felt pattern pieces on your page the way you want it to look once it's all finished. 


    2. Pull out your Wonder-Under. Notice that your Wonder-Under has two different sides, a shiny rough side, and a more matte-looking smooth side. Place the Wonder-Under with the shiny rough side facing DOWN.  


    3. Take all your felt pattern pieces and flip them so that the RIGHT side is facing DOWN on the Wonder-Under. Trace around all your pattern pieces. This doesn't have to look pretty or be precise.


    4. Once you have all the pieces traced you are going to begin cutting them out. Don't bother cutting on the line though, cut about 1/8 to 1/4 of an inch INSIDE the line. You want the pieces of Wonder-Under to be slightly smaller than the pieces of felt. It makes it much easier to peel the Wonder-Under off the back of the felt!

    5. Now it's time to iron the Wonder-Under to the felt! To do this place the shiny rough side of the Wonder-Under to the WRONG side of the felt pattern piece. Press for 5-8 seconds with a hot, dry iron. Let cool. Repeat for all your felt pieces.


    6. Next, carefully peal the Wonder-Under off the back of the felt. Position each of your pieces onto your page with the fusible web side DOWN. Cover with a damp press cloth and then press firmly for 10-15 seconds with a hot iron. Repeat, lifting and overlapping the iron until all pieces are fused. Remove press cloth and iron the page to dry excess moisture.  

    NOTE: Rather than pressing all the pieces down at the same time I often do one piece at a time so that I can make sure that they get fused in the correct spot. I'm always worried that if I fuse too many of the pieces at once, something might shift a little and come out funny looking. 


    7. Once all your pieces are fused, admire your work and start embellishing!


    Thursday, January 19, 2012

    Easy Peanut Butter Cookies

    1 cup peanut butter, 1/2 cup white sugar, 1/2 cup brown sugar, 1 egg. (You can use 1 cup white sugar, but I wanted the mix.) Mix well and place in fridge for 15 minutes so they are easier to work with. Grease a cookie sheet with Pam. (I used a stone cookie pan...works FABULOUSLY.) Roll into a half dollar sized ball and make criss cross pattern with a fork. 350 for 15 minutes and viola!!! It can't get easier than this.

    The easiest and best peanut butter cookies I've ever made. 1 cup peanut butter, 1/2 cup white sugar, 1/2 cup brown sugar, 1 egg. (You can use 1 cup white sugar, but I wanted the mix.) Mix well and place in fridge for 15 minutes so they are easier to work with. Grease a cookie sheet with Pam. (I used a stone cookie pan...works FABULOUSLY.) Roll into a half dollar sized ball and make criss cross pattern with a fork. 350 for 15 minutes and viola!!! It can't get easier than this.

    Pink Panties - Pinterest.com

    Pink Panties ! Ingredients A TUB OF COOL WHIP A BOTTLE OF YOUR FAVIROTE VODKA 1 CAN OF FROZEN PINK LEMONADE ICE A BLENDER CUPS ---Hmm this does sound good.  Gotta try it.  But, WOW...a bottle of Vodka?
    Pinned Image

    WD - 40 Uses - as found on Pinterest.com

    WD-40 USES:           1. Protects silver from tarnishing.      2. Removes road tar and grime from cars.      3. Cleans and lubricates guitar strings.      4. Gives floors that 'just-waxed' sheen without making them slippery.      5. Keeps flies off cows. (I love this one!)      6. Restores and cleans chalkboards.      7. Removes lipstick stains.      8. Loosens stubborn zippers.      9. Untangles jewelry chains.      10. Removes stains from stainless steel sinks.      11. Removes dirt and grime from the barbecue grill.      12. Keeps ceramic/terra cotta garden pots from oxidizing.      13. Removes tomato stains from clothing.      14. Keeps glass shower doors free of water spots.      15. Camouflages scratches in ceramic and marble floors.      16. Keeps scissors working smoothly.      17. Lubricates noisy door hinges on vehicles and doors in homes.      18. It removes black scuff marks from the kitchen floor! Use      WD-40 for those nasty tar and scuff marks on flooring. It doesn't      seem to harm the finish and you won't have to scrub nearly as hard to      get them off. Just remember to open some windows if you have a lot      of marks.      19. Bug guts will eat away the finish on your car if not removed      quickly! Use WD-40!      20. Gives a children's playground gym slide a shine for a super      fast slide.      21. Lubricates gear shift and mower deck lever for ease of      handling on riding mowers...      22. Rids kids rocking chairs and swings of squeaky noises.      23. Lubricates tracks in sticking home windows and makes them      easier to open..      24. Spraying an umbrella stem makes it easier to open and close.      25. Restores and cleans padded leather dashboards in vehicles,      as well as vinyl bumpers.      26. Restores and cleans roof racks on vehicles.      27. Lubricates and stops squeaks in electric fans      28. Lubricates wheel sprockets on tricycles, wagons, and      bicycles for easy handling.      29. Lubricates fan belts on washers and dryers and keeps them      running smoothly.      30. Keeps rust from forming on saws and saw blades, and other tools.      31. Removes splattered grease on stove.      32. Keeps bathroom mirror from fogging.      33. Lubricates prosthetic limbs.      34. Keeps pigeons off the balcony (they hate the smell).      35. Removes all traces of duct tape.      36. Folks even spray it on their arms, hands, and knees to      relieve arthritis pain.      37. Florida 's favorite use is: 'cleans and removes love bugs      from grills and bumpers.'      38. The favorite use in the state of New York , WD-40 protects      the Statue of Liberty from the elements.      39. WD-40 attracts fish. Spray a little on live bait or lures      and you will be catching the big one in no time. Also, it's a lot      cheaper than the chemical attractants that are made for just that      purpose. Keep in mind though, using some chemical laced baits or      lures for fishing are not allowed in some states.      40. Use it for fire ant bites. It takes the sting away      immediately and stops the itch.      41. WD-40 is great for removing crayon from walls. Spray on      the mark and wipe with a clean rag.      42. Also, if you've discovered that your teenage daughter has      washed and dried a tube of lipstick with a load of laundry, saturate      the lipstick spots with WD-40 and rewash. Presto! The lipstick is      gone!      43. If you sprayed WD-40 on the distributor cap, it would      displace the moisture and allow the car to start.                P.S. The basic ingredient is Fish Oil

    WD-40 USES: 1. Protects silver from tarnishing. 2. Removes road tar and grime from cars. 3. Cleans and lubricates guitar strings. 4. Gives floors that 'just-waxed' sheen without making them slippery. 5. Keeps flies off cows. (I love this one!) 6. Restores and cleans chalkboards. 7. Removes lipstick stains. 8. Loosens stubborn zippers. 9. Untangles jewelry chains. 10. Removes stains from stainless steel sinks. 11. Removes dirt and grime from the barbecue grill. 12. Keeps ceramic/terra cotta garden pots from oxidizing. 13. Removes tomato stains from clothing. 14. Keeps glass shower doors free of water spots. 15. Camouflages scratches in ceramic and marble floors. 16. Keeps scissors working smoothly. 17. Lubricates noisy door hinges on vehicles and doors in homes. 18. It removes black scuff marks from the kitchen floor! Use WD-40 for those nasty tar and scuff marks on flooring. It doesn't seem to harm the finish and you won't have to scrub nearly as hard to get them off. Just remember to open some windows if you have a lot of marks. 19. Bug guts will eat away the finish on your car if not removed quickly! Use WD-40! 20. Gives a children's playground gym slide a shine for a super fast slide. 21. Lubricates gear shift and mower deck lever for ease of handling on riding mowers... 22. Rids kids rocking chairs and swings of squeaky noises. 23. Lubricates tracks in sticking home windows and makes them easier to open.. 24. Spraying an umbrella stem makes it easier to open and close. 25. Restores and cleans padded leather dashboards in vehicles, as well as vinyl bumpers. 26. Restores and cleans roof racks on vehicles. 27. Lubricates and stops squeaks in electric fans 28. Lubricates wheel sprockets on tricycles, wagons, and bicycles for easy handling. 29. Lubricates fan belts on washers and dryers and keeps them running smoothly. 30. Keeps rust from forming on saws and saw blades, and other tools. 31. Removes splattered grease on stove. 32. Keeps bathroom mirror from fogging. 33. Lubricates prosthetic limbs. 34. Keeps pigeons off the balcony (they hate the smell). 35. Removes all traces of duct tape. 36. Folks even spray it on their arms, hands, and knees to relieve arthritis pain. 37. Florida 's favorite use is: 'cleans and removes love bugs from grills and bumpers.' 38. The favorite use in the state of New York , WD-40 protects the Statue of Liberty from the elements. 39. WD-40 attracts fish. Spray a little on live bait or lures and you will be catching the big one in no time. Also, it's a lot cheaper than the chemical attractants that are made for just that purpose. Keep in mind though, using some chemical laced baits or lures for fishing are not allowed in some states. 40. Use it for fire ant bites. It takes the sting away immediately and stops the itch. 41. WD-40 is great for removing crayon from walls. Spray on the mark and wipe with a clean rag. 42. Also, if you've discovered that your teenage daughter has washed and dried a tube of lipstick with a load of laundry, saturate the lipstick spots with WD-40 and rewash. Presto! The lipstick is gone! 43. If you sprayed WD-40 on the distributor cap, it would displace the moisture and allow the car to start. P.S. The basic ingredient is Fish Oil
    Southern Tea Cakes

    I remember when I was growing up, my Granddaddy's Sister, Aunt Nellie, would come to visit.  All of us kids would go crazy when we saw a car pull up in front of my grandparents old, southern house.  We knew 1) that Aunt Nellie was a strict disciplinarian and she would make us mind and 2) she was the best cook in the world.  She made the best tea cakes.  We kids (all of my cousins) would come home from school and as we crossed the railroad tracks to Granddaddy and Memma's house, we could smell those tea cakes as they baked in the oven.  Aunt Nellie was an old maid school teacher.  To this day, I have the old school bell that she kept on her desk to ring and let the kids know that it was either time to eat or time for recess.  Aunt Nellie has been gone for way too many years, but she will never be forgotten.

    4 cups all-purpose flour
    2 teaspoons baking powder
    1 teaspoon baking soda
    2 eggs
    2 cups sugar
    1/2 cup buttermilk
    2 sticks butter, softened
    1 teaspoon vanilla
    Sift flour, baking powder and soda.
    Add the rest of the ingredients and mix well. This is certainly different from most cookie recipes. The butter and sugar aren’t creamed first. Everything goes into the mixing bowl together after the dry ingredients are sifted. The dough will be sticky so you will need to generously flour your surface before turning out the dough.
    Place the dough on the floured surface and keep adding flour until the dough loses its stickiness. Divide, wrap in plastic wrap and chill for at least one hour in the refrigerator. I divided the dough in half, but the next time I will divide in fourths. The tea cakes turn out better and keep their shape if you don’t let the dough warm up prior to baking.
    Preheat the oven to 350 degrees and take out your dough but only the part that you are going to use. Let the rest stay in the refrigerator.
    Roll out the dough to about 1/4 inches thick. Cut with a small juice glass or a Vienna sausage can. I don’t think conventional cookie cutters will work right.
    Bake at 350 degrees for 10 to 12 minutes. I baked for the full 12 minutes and they were perfect. Cool on a rack and then store in a jar.

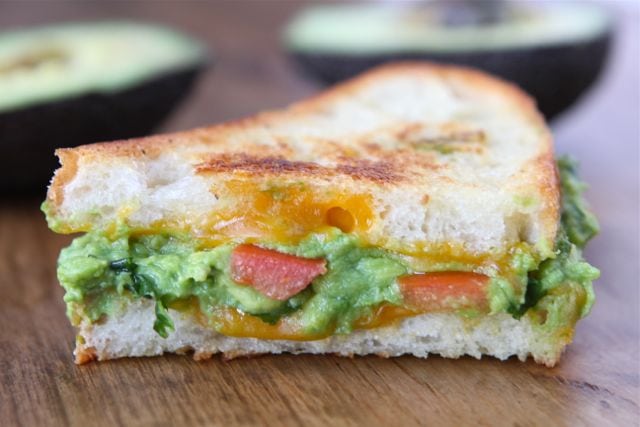
    Guacamole Grilled Cheese Sandwich

    Yield: 2 sandwiches
    Prep Time: 5 minutes
    Cook Time: 5-7 minutes
    The guacamole takes this grilled cheese sandwich to a whole new level of goodness.  This is from "TwoPeasandtheirIPOD.com found on Pinterest.com...It looks so so delicious.

    Ingredients:

    To make the guacamole:
    2 ripe avocados
    1/2 small onion, minced
    1 clove garlic, minced
    1 small jalapeño, stems and seeds removed, minced
    2 tablespoons cilantro leaves, finely chopped
    1 tablespoon of fresh lime juice
    1/2 teaspoon coarse salt
    A dash of freshly grated black pepper
    1 Roma tomato, chopped
    4 slices crusty white bread
    4 slices Cheddar cheese
    Butter, for buttering bread

    Directions:

    1. To make the guacamole-cut avocados in half. Remove seed. Scoop out avacado from the peel, put in a large bowl. Using a fork, mash the avocado. Add the onion, garlic, jalapeño, cilantro, lime juice, salt and pepper. Stir until well combined. Add the chopped tomato and stir.
    2. Heat a pan or griddle to medium-high heat. Spread desired amount of guacamole on both slices of bread then top with cheese. Butter outer slices of bread and grill on one side for about 2 minutes or until golden and crispy. Flip the sandwich and grill until golden brown. Make the other sandwich the same way and serve warm.

    New Fangled Banana Pudding - Pinterest.com

    Sinful Banana Pie  • 3 bananas   • 1 tin of sweetened condensed milk   • 2 cups whipping cream (or use cool whip)  • 1 package of graham crackers (or use graham crust)  • 1 stick of butter (omit if using premade crust)  • 1 tsp vanilla   • 1 small bar of chocolate   Your first step can be done way ahead of time (at least hours but can be as much as months before). Remove the label on the condensed milk and submerge the unopened can in pot of water. Cover and boil for 2.5 hours. Warning: Be sure to keep the can covered by water at all times!!   After required time has passed, take pot off the stove and allow the can to cool. In case you're wondering – you just made toffee!   To make the crust (*You can skip this step entirely by buying a ready made graham cracker crust.)  • Grind up crackers in food processor.   • Melt stick of butter in microwave and pour into crumb mixture.   • Blend until you have a moist sand mixture.   • Smooth wet crumbs into pie plate to make a crust.   • Bake at 350F for 10 minutes.   • Set aside to cool.   To make whipped cream (*You can skip this step entirely by using cool whip. )  • Whip cold cream and vanilla on high until whipped  • Set aside   Cut up bananas into slices and lay into your crust. It doesn't matter how you arrange them really. Just go wild.   Open toffee can, mix with knife until smooth, pour on bananas.   Spread whipped cream over the whole mess   Grate chocolate on top (optional)  Put in fridge to set for at least 1 hour
    Sinful Banana Pie • 3 bananas • 1 tin of sweetened condensed milk • 2 cups whipping cream (or use cool whip) • 1 package of graham crackers (or use graham crust) • 1 stick of butter (omit if using premade crust) • 1 tsp vanilla • 1 small bar of chocolate Your first step can be done way ahead of time (at least hours but can be as much as months before). Remove the label on the condensed milk and submerge the unopened can in pot of water. Cover and boil for 2.5 hours. Warning: Be sure to keep the can covered by water at all times!! After required time has passed, take pot off the stove and allow the can to cool. In case you're wondering – you just made toffee! To make the crust (*You can skip this step entirely by buying a ready made graham cracker crust.) • Grind up crackers in food processor. • Melt stick of butter in microwave and pour into crumb mixture. • Blend until you have a moist sand mixture. • Smooth wet crumbs into pie plate to make a crust. • Bake at 350F for 10 minutes. • Set aside to cool. To make whipped cream (*You can skip this step entirely by using cool whip. ) • Whip heavy cold cream and vanilla on high until whipped • Set aside Cut up bananas into slices and lay into your crust. It doesn't matter how you arrange them really. Just go wild. Open toffee can, mix with knife until smooth, pour on bananas. Spread whipped cream over the whole mess Grate chocolate on top (optional) Put in fridge to set for at least 1 hour

    Doesn't this sound just yummy?  Additionally, making toffee?  How neat is that?  I can think of alot of things to do with toffee...like drink it?  No, but this could be used in a Paula Deen Banana pudding....just improvise.  Eat and enjoy!!!  Can you believe that January is almost over?  Life is definitely speeding by.  Happy what's left of January to you and here is looking at February.

    Tuesday, January 17, 2012

    Old Fashioned Potato Candy using Different Recipe - Simpler

    My Aunts in Alabama used to make this candy back in the day and it was oh, so good.  Be careful, I recall that they often used to much of the mashed potatoes and made a mess. 
    The ingredients for this are simple ones, my favorite kind! Peanut butter, confectioner’s sugar, and a potato.
    You can add a teaspoon of vanilla if you like, but you don’t have to. Y’all know I like things as simple as possible.
    You can also leave the peanut butter out and just roll it into balls.  But, oh the PB makes it so so good.
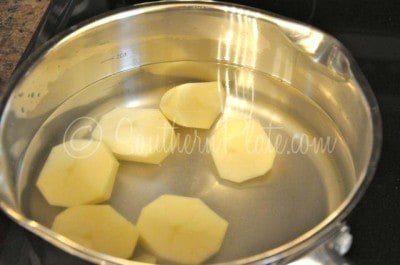
    Peel and slice your potato and cover it with water. bring to a boil and cook until tender.
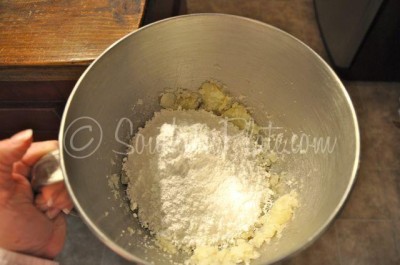
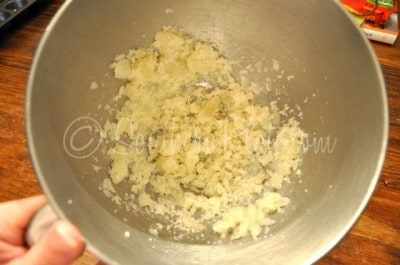
    Drain your potato water and place the cooked potato in a mixing bowl.
    Beat it up real good.
    Add about half of your confectioner’s sugar and mix it up well again.
    Until you have a pulpy, liquidy, mess.
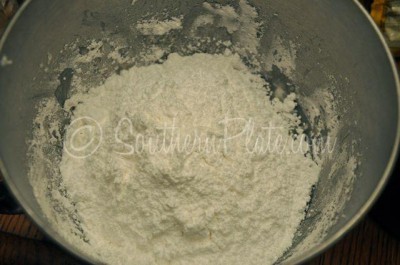
    Dump in the rest of your sugar.
    Sure you can add it “gradually” if you have all day but it’s just as good to dump it all in there and get on with making some candy.
    After that second mixing, you’ll have yourself a good stiff dough, like the consistency of cookie dough, only maybe a wee bit stiffer.
    You may need to add a little more sugar, depending on the size of your potato, to get this stiff consistency.
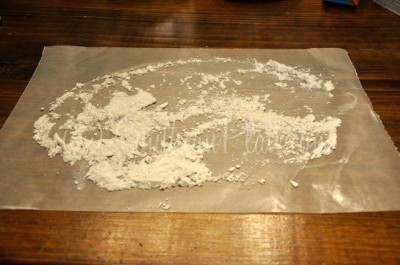
    Place a big old sheet of waxed paper on your countertop.
    Put some confectioner’s sugar on that to keep your dough from sticking.
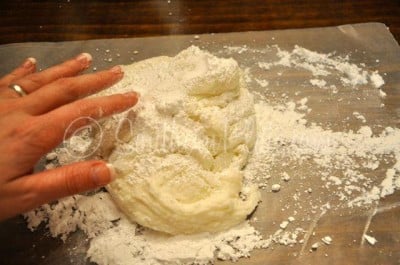
    Dump your blob of dough on that. You’ll have to scrape down the sides a bit to get it all.
    Dust the top with some more sugar.  Not a dusting but a hefty sprinkling.
    Roll that out until it is about a quarter of an inch.
    ~
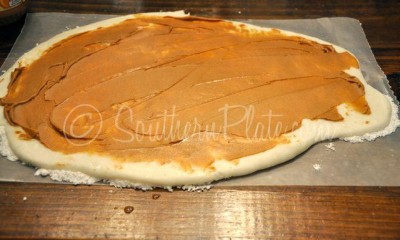
    Smear some peanut butter on that.
    I have no idea how much peanut butter you’ll need so just go with your gut here.
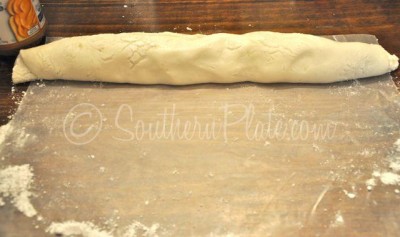
    Now roll that up log style, like you’re rolling up cinnamon rolls.
    until you have this.
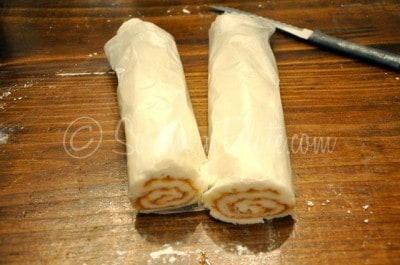
    Now since we have the waxed paper already out there anyway, roll your log up in your waxed paper.
    To make life easier, I cut my roll in half.
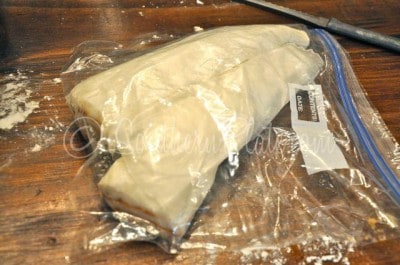
    Then they will both fit in a gallon zipper bag. Place this in the fridge until thoroughly chilled.
    When ready to serve, remove waxed paper and slice into inch slices.
    Makes about forty pieces of candy.

    Ingredients
    • 1 small potato
    • 2 pounds confectioner's sugar
    • peanut butter
    Instructions
    1. Peel and slice potato. In small sauce pot, cover potato slices with water and cook over medium heat until soft. Drain potato and place in mixing bowl. Beat until mashed. Add 1/2 sugar and mix well. Mix in remaining sugar, scraping down sides as needed.
    2. Line a countertop with a sheet of waxed paper dusted with confectioner's sugar. Scrape out dough onto waxed paper and dust top with more confectioner's sugar. Roll out to a thickness of about 1/4 of an inch (don't go getting a ruler here, just eyeball it. This isn't rocket science). Spread dough with peanut butter and roll up like you are making cinnamon rolls. Once you have rolled up into a log, roll log up in your waxed paper and cut in half. Place halves in a gallon zipper seal bag and store in the fridge until ready to serve.
    3. When ready to serve remove waxed paper an slice into 1/4 inch slices. Store leftovers in the refrigerator.